Mybatis 简介 MyBatis 官网:https://mybatis.org/mybatis-3/zh/index.html
MyBatis 是一个持久层框架,它对 jdbc 的操作数据库的过程进行封装,使开发者只需要关注 SQL 本身,而不需要花费精力去处理例如注册驱动、创建 connection、创建 statement、手动设置参数、结果集检索等 jdbc 繁杂的过程代码。
Mybatis 通过 xml 或注解的方式将要执行的各种 statement(statement、preparedStatemnt、CallableStatement)配置起来,并通过 java 对象和 statement 中的 sql 进行映射生成最终执行的 sql 语句,最后由 mybatis 框架执行 sql 并将结果映射成 java 对象并返回。
简单实例 首先在数据库中建立一个 user 表:
1
2
3
4
5
create table user ( id int auto_increment primary key , username varchar (255 ) null , address varchar (255 ) null )
新建 maven 项目,引入相关依赖:
1 2 3 4 5 6 7 8 9 10 11 12 <dependencies > <dependency > <groupId > org.mybatis</groupId > <artifactId > mybatis</artifactId > <version > 3.4.6</version > </dependency > <dependency > <groupId > mysql</groupId > <artifactId > mysql-connector-java</artifactId > <version > 8.0.17</version > </dependency > </dependencies >
在 resources 目录下新建 mybatis-config.xml 文件,文件内容如下:
1
2
3
4
5
6
7
8
9
10
11
12
13
14
15
16
17
18
19
20
<?xml version="1.0" encoding="UTF-8" ?> <!DOCTYPE configuration PUBLIC "-//mybatis.org//DTD Config 3.0//EN" "http://mybatis.org/dtd/mybatis-3-config.dtd" > <configuration > <environments default ="development" > <environment id ="development" > <transactionManager type ="JDBC" /> <dataSource type ="POOLED" > <property name ="driver" value ="com.mysql.cj.jdbc.Driver" /> <property name ="url" value ="jdbc:mysql:///mybatis?serverTimezone=Asia/Shanghai" /> <property name ="username" value ="your_username" /> <property name ="password" value ="your_password" /> </dataSource > </environment > </environments > <mappers > <mapper resource ="mapper/UserMapper.xml" /> </mappers > </configuration >
之后,建立一个与数据库表对应的 Java 实体类 User :
1
2
3
4
5
6
public class User private Integer id; private String username; private String address; }
在 resources 目录下新建 mapper 文件夹,在 mapper 文件夹下新建一个 UserMapper.xml如下:
1
2
3
4
5
6
7
8
9
<?xml version="1.0" encoding="utf-8" ?> <!DOCTYPE mapper PUBLIC "-//mybatis.org//DTD Mapper 3.0//EN" "http://mybatis.org/dtd/mybatis-3-mapper.dtd" > <mapper namespace ="top.liuzhenhui.mapper.UserMapper" > <select id ="getUserById" resultType ="top.liuzhenhui.model.User" > select * from user where id = #{id}; </select > </mapper >
最后,编写主方法运行 UserMapper.xml 下定义的 sql 语句。
1
2
3
4
5
6
7
8
9
10
11
12
13
14
15
16
public class Main public static void main (String[] args) throws IOException SqlSessionFactory sqlSessionFactory = new SqlSessionFactoryBuilder() .build(Resources.getResourceAsStream("mybatis-config.xml" )); try (SqlSession sqlSession = sqlSessionFactory.openSession()){ if (sqlSession.getConnection() != null ){ System.out.println("连接成功" ); User u = sqlSession.selectOne("top.liuzhenhui.mapper.UserMapper.getUserById" , 1 ); System.out.println(u); }else System.out.println("连接失败" ); } } }
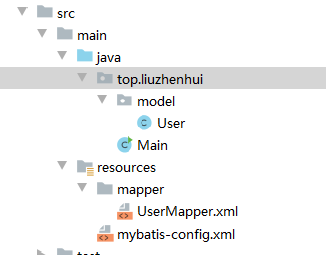
目录结构如下图
以上便是最基础的 mybatis 使用,需要通过配置文件创建一个 SqlSessionFactory 用于获取 SqlSession,SqlSession 中对数据库操作的进行了封装。
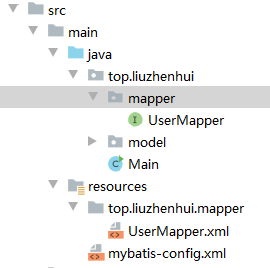
使用 mapper 代理 在 mybatis 中,还可以通过定义接口进一步简化 dao 层的开发,也是常用的方法,新建一个 mapper 包,在其中新建一个 UserMapper 接口:
1
2
3
4
public interface UserMapper public User getUserById (int id) }
接口的全限定名必须与 UserMapper.xml 中的 namespace 一致。然后,修改 mybatis-config.xml 中的配置,将新建的 Mapper 接口配置上:
1 2 3 4 5 <mappers > <package name ="top.liuzhenhui.mapper" /> </mappers >
由于 mybatis 要求 mapper.xml 与 mapper 接口必须放在同一个包下,所以需要在 resources 目录下新建与 mapper 接口包名一致的文件夹,将 UserMapper.xml 放在该文件夹下。
之后,修改主方法如下即可:
1
2
3
4
5
6
7
8
9
10
11
12
13
14
15
16
public static void main (String[] args) throws IOException SqlSessionFactory sqlSessionFactory = new SqlSessionFactoryBuilder() .build(Resources.getResourceAsStream("mybatis-config.xml" )); try (SqlSession sqlSession = sqlSessionFactory.openSession()){ if (sqlSession.getConnection() != null ){ System.out.println("连接成功" ); UserMapper mapper = sqlSession.getMapper(UserMapper.class ) ; User u = mapper.getUserById(8 ); System.out.println(u); }else System.out.println("连接失败" ); } }
调用 SqlSession 的 getMapper 方法,传入自定义 Mapper 接口的类,mybatis 会通过动态代理自动创建一个对象,对象中的方法代理了 sql 语句的执行。
配置 typeAliase 之前的代码在写返回类型的时候,必须写类的全限定名 top.liuzhenhui.model.User,这种做法显然十分麻烦,mybatis 支持自定义别名,在 mybatis-config.xml 文件中添加如下配置:
1 2 3 4 5 <configuration > <typeAliases > <package name ="top.liuzhenhui.model" /> </typeAliases >
它会自动利用包扫描批量给对象定义别名,批量定义默认的类的别名,是类名首字母小写。之后就可以在 UserMapper.xml 中使用别名:
1 2 3 4 5 6 <mapper namespace ="top.liuzhenhui.mapper.UserMapper" > <select id ="getUserById" resultType ="user" > select * from user where id = #{id}; </select > </mapper >
mybatis 已经对基本数据类型以及他们的包装类和 String 类定义了别名,直接使用即可。
定义 TypeHandler 在 mybatis 中,内置了一些 TypeHandler,能够将 jdbc 数据映射为 Java 类型,例如 StringTypeHandler,EnumTypeHandler等,但是在某些情况下,还是需要自定义 TypeHandler 处理特殊类型。
例如,给之前的 user 表添加一个字段 interests 表示爱好,一个 user 可能不止一个爱好,因此用列表表示,修改 User 类如下:
1
2
3
4
5
6
7
public class User private Integer id; private String username; private String address; private List<String> interests;
然后,自定义一个 TypeHandler,自定义的 TypeHandler 需要实现 TypeHandler 接口,可以使用注解 @MappedJdbcType 标注 Jdbc 类型,@MappedTypes 标注 Java 类型。如果不使用注解标注,需要在配置文件里标注。
1
2
3
4
5
6
7
8
9
10
11
12
13
14
15
16
17
18
19
20
21
22
23
24
25
26
27
28
29
30
31
32
33
34
35
36
37
38
@MappedJdbcTypes (JdbcType.VARCHAR)@MappedTypes (List.class ) public class List2VarcharTypeHandler implements TypeHandler <List <String >> @Override public void setParameter (PreparedStatement ps, int i, List<String> parameter, JdbcType jdbcType) throws SQLException StringBuilder sb = new StringBuilder(); for (String s : parameter){ sb.append(s); sb.append(',' ); } ps.setString(i, sb.toString()); } @Override public List<String> getResult (ResultSet rs, String columnName) throws SQLException String s = rs.getString(columnName); if (s == null || s.length() == 0 ) return null ; String[] strings = s.split("," ); return Arrays.asList(strings); } @Override public List<String> getResult (ResultSet rs, int columnIndex) throws SQLException String s = rs.getString(columnIndex); if (s == null || s.length() == 0 ) return null ; String[] strings = s.split("," ); return Arrays.asList(strings); } @Override public List<String> getResult (CallableStatement cs, int columnIndex) throws SQLException String s = cs.getString(columnIndex); if (s == null || s.length() == 0 ) return null ; String[] strings = s.split("," ); return Arrays.asList(strings); } }
自定义 TypeHandler 后还需要在 mybatis-config.xml 中做全局配置,或者在 mapper.xml 里做局部配置亦可,这里配置全局配置。
1 2 3 4 5 6 7 8 <configuration > <typeAliases > <package name ="top.liuzhenhui.model" /> </typeAliases > <typeHandlers > <package name ="top.liuzhenhui.typehandler" /> </typeHandlers >
配置完成后,就可以正常使用了。
传入参数 #{} 与 ${} 的区别 在 mybatis 中,在 mapper.xml 中引用传入的变量时,可以使用 #{} 和 ${},这两种方式的区别是,#{} 是采用符号占位,${} 是 SQL 拼接,而且在低版本中 ${} 需要使用 @Param 注解为参数取别名 。
如下图是 #{} 执行时的 SQL:
下图是 ${} 执行时的 SQL:
传入多个简单类型参数 在 UserMapper.xml 中加入新的语句:
1 2 3 <update id ="updateUser" > update user set username = #{username} where id = #{id} </update >
在 UserMapper 接口中声明该方法:
1 public void updateUser (String username, Integer id)
发现调用这个方法时会报错:
这是因为传入多个参数时要使用系统提供的默认名字 arg0,arg1… 或者 param1, param2….,这样不太方便,可以使用 @Param 注解指定参数名:
1 public void updateUser (@Param("username" ) String username, @Param ("id" ) Integer id)
传入对象参数 在 UserMapper.xml 中加入新语句:
1 2 3 <insert id ="addUser" useGeneratedKeys ="true" > insert into user (username, address, interests) values (#{username}, #{address}, #{interests}); </insert >
在 UserMapper 接口中声明对应方法:
1 public void addUser (User user)
调用能成功,在传入参数只有一个对象时,可以直接解析出对象的字段,有时候需要传入多个对象,同样也需要 @Param 注解指定参数名:
1 public void addUser (@Param("u" ) User user)
这样 UserMapper.xml 中的语句也需要变化,利用 . 符号来访问值:
1 2 3 4 <insert id ="addUser" useGeneratedKeys ="true" > insert into user (username, address, interests) values (#{u.username}, #{u.address}, #{u.interests}); </insert >
Map参数 在传入参数时也可以传入一个 Map 作为参数。Map 中的 key 作为 #{} 或 ${} 中引用的变量名即可。
resultMap resultType 返回的类型可以是简单类型,可以是对象,可以是集合,也可以是一个 hashmap,如果是 hashmap,map 中的 key 就是字段名,value 就是字段的值。但是有的时候需要返回的对象比较复杂,需要使用 resultMap 来自定义映射的结果。
在 mapper.xml 中定义一个 resultMap,之后便可使用这个 resultMap 定义返回值。
1 2 3 4 5 6 7 8 9 10 11 12 13 14 <resultMap id ="MyResultMap" type ="user" > <id column ="id" property ="id" /> <result column ="username" property ="username" /> <result column ="address" property ="address" /> </resultMap > <select id ="getUserById" resultMap ="MyResultMap" > select * from user where id = #{id}; </select >
在 mybatis 低版本中,使用 resultMap 还需要有一个无参构造方法,resultMap 中也支持选定指定的构造函数:
1 2 3 4 5 6 7 8 9 <resultMap id ="MyResultMap" type ="user" > <constructor > <idArg name ="id" column ="id" > </idArg > <arg name ="username" column ="username" > </arg > </constructor > </resultMap >
这样还需要在 User 类的构造函数中加入 @Param 注解才能解析成功,因为 mybatis 提供的默认参数名是 arg0,arg1… 以及 param1, param2…
1
2
3
4
public User (@Param("id" ) Integer id, @Param ("username" ) String username) this .id = id; this .username = username; }
动态 SQL 动态 SQL 功能十分强大,在许多场景都能使用, mybatis 中提供了许多动态 SQL 节点。
if if 是一个判断节点,如果满足某个条件,节点中的 SQL 就会生效。
在 mapper.xml 中加入如下语句:
1 2 3 4 5 6 <select id ="getUserByPage" resultType ="user" > select * from user <if test ="start != null and count != null" > limit #{start}, #{count} </if > </select >
在 mapper 接口中声明该方法即可:
1 public List<User> getUserByPage (@Param("start" ) Integer start, @Param ("count" ) Integer count)
if 节点中,test 表示判断条件,如果判断结果为 true,则 if 节点的中的 SQL 会生效,否则不会生效。
where where 可以处理查询参数,有满足的条件,where 节点会自动加上,还会自动处理 and 关键字 。
在 mapper.xml 中加入以下语句:
1 2 3 4 5 6 7 8 9 10 11 <select id ="getUserByUsernameOrId" resultType ="user" > select * from user <where > <if test ="username != null" > and username = #{username} </if > <if test ="id != null" > and id = #{id} </if > </where > </select >
在 mapper 接口中声明该方法即可:
1 public List<User> getUserByUsernameOrId (@Param("username" ) String username, @Param ("id" ) Integer id)
foreach foreach 用于处理数组/集合参数,在 mapper.xml 中加入以下语句:
1 2 3 4 5 6 7 8 9 <select id ="getUserByIds" resultType ="user" > select * from user <if test ="ids != null and ids.size() > 0" > where id in <foreach collection ="ids" item ="id" open ="(" close =")" separator ="," > #{id} </foreach > </if > </select >
再在 mapper 接口中声明方法后,上述语句调用时的 sql 语句是 select * from user where id in ( ? , ? , ? , ? , ? , ? , ? ) 由此可知在 foreach 标签中,collection 是传入的集合或数组参数,open 表示开始符号,close 表示结束符号,separator 是分隔符,item 表示每一个元素。
sql片段 在开发中,SQL 的拼接很常见,由于一些拼接的 sql 具有重复性高的特点,这时最好把重复的 sql 抽取出来,作为公用的 sql 片段。
1 2 3 4 5 6 7 8 <sql id ="base_column" > id,username,address,interests </sql > <select id ="getUserById" resultMap ="MyResultMap" > select <include refid ="base_column" /> from user where id = #{id}; </select >
通过 sql 标签定义一个 sql 片段,可以在语句中用 include 标签引用它。
set set 标签通常用于更新中,因为大部分情况下,更新的字段可能不确定,如果对象中存在该字段的值,就更新该字段,不存在,就不更新。
1 2 3 4 5 6 7 8 9 10 11 12 13 14 15 <update id ="updateUser" > update user <set > <if test ="username!=null" > username = #{username}, </if > <if test ="address!=null" > address = #{address}, </if > <if test ="interests!=null" > interests = #{interests}, </if > </set > where id = #{id}; </update >
缓存 mybatis 一级缓存的作用域是同一个 SqlSession ,在同一个 SqlSession 中两次执行相同的 sql 语句,第一次执行完毕会将数据库中查询的数据写到缓存(内存),第二次会从缓存中获取数据将不再从数据库查询,从而提高查询效率。当一个 SqlSession 结束后该 SqlSession 中的一级缓存也就不存在了。Mybatis 默认开启一级缓存。
1
2
3
4
5
6
7
8
9
10
11
12
13
14
15
16
17
18
19
public static void main (String[] args) throws IOException SqlSessionFactory sqlSessionFactory = new SqlSessionFactoryBuilder() .build(Resources.getResourceAsStream("mybatis-config.xml" )); try (SqlSession sqlSession = sqlSessionFactory.openSession()){ if (sqlSession.getConnection() != null ){ System.out.println("连接成功" ); UserMapper mapper = sqlSession.getMapper(UserMapper.class ) ; User u = mapper.getUserById(11 ); u = mapper.getUserById(11 ); u = mapper.getUserById(11 ); u = mapper.getUserById(12 ); System.out.println(u); sqlSession.commit(); }else System.out.println("连接失败" ); } }
例如以上一段代码日志输出如下,getUserById(11) 的语句只执行了一次:
需要注意,Spring 整合 mybatis 后,由于 Spring 提供的 SqlSessionTemplate 会在每一次查询后及时关闭 SqlSession,因此一级缓存看起来失效了 。但是开启事务的情况下,spring 使用 ThreadLocal 获取当前资源绑定同一个 sqlSession,因此此时一级缓存是有效的。
mybatis 二级缓存是多个 SqlSession 共享的,其作用域是 mapper 的同一个 namespace ,不同的 sqlSession 两次执行相同 namespace 下的 sql 语句且向 sql 中传递参数也相同即最终执行相同的 sql 语句,第一次执行完毕会将数据库中查询的数据写到缓存(内存),第二次会从缓存中获取数据将不再从数据库查询,从而提高查询效率。mybatis 默认没有开启二级缓存需要在 setting 全局参数中配置开启二级缓存。
在 mybatis-config.xml 中的配置二级缓存1 2 3 4 5 <configuration > <settings > <setting name ="cacheEnabled" value ="true" /> </settings >
在 mapper.xml 中开启二级缓存
1 2 3 <mapper namespace ="top.liuzhenhui.mapper.UserMapper" > <cache > </cache >
二级缓存需要让 User 类实现 Serializable 接口(如果 User 类中包含其它类,也需要实现序列化):
1 2 public class User implements Serializable
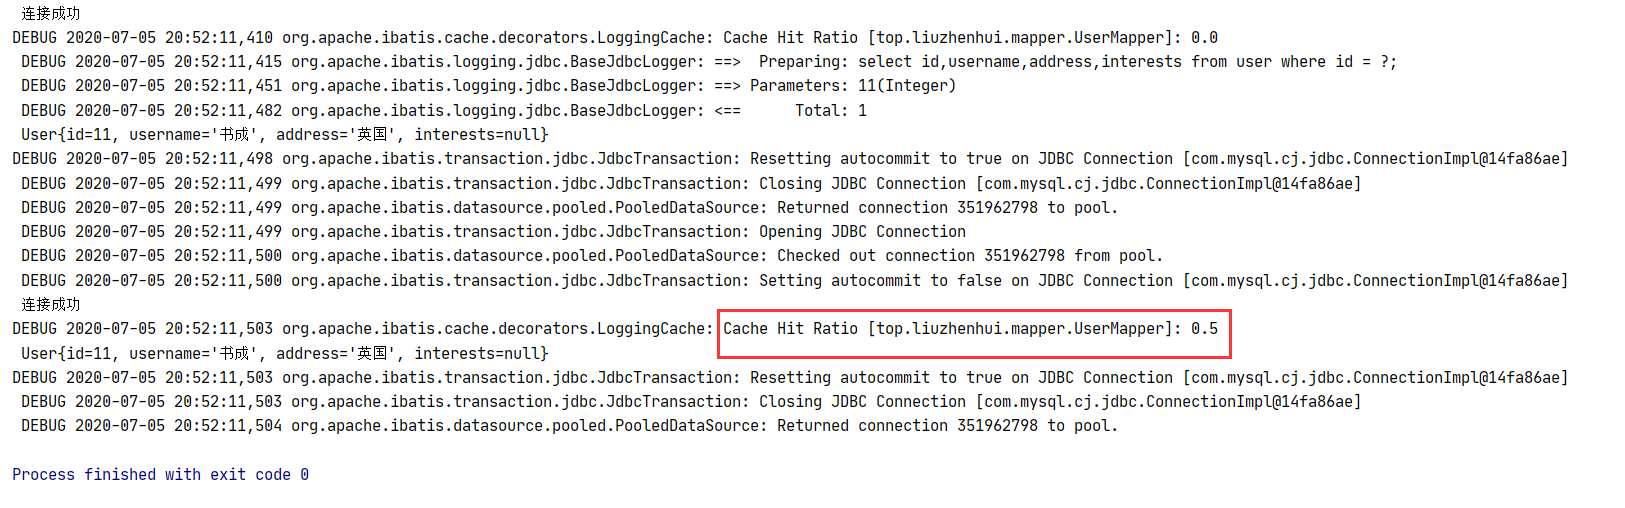
最后,修改 main 方法查看开启二级缓存后在不同 SqlSession 下的执行情况:
1 2 3 4 5 6 7 8 9 10 11 12 13 14 15 16 17 18 19 20 21 public class Main public static void main (String[] args) throws IOException SqlSessionFactory sqlSessionFactory = new SqlSessionFactoryBuilder() .build(Resources.getResourceAsStream("mybatis-config.xml" )); testCache(sqlSessionFactory); testCache(sqlSessionFactory); } private static void testCache (SqlSessionFactory sqlSessionFactory) try (SqlSession sqlSession = sqlSessionFactory.openSession()){ if (sqlSession.getConnection() != null ){ System.out.println("连接成功" ); UserMapper mapper = sqlSession.getMapper(UserMapper.class ) ; User u = mapper.getUserById(11 ); System.out.println(u); }else System.out.println("连接失败" ); } } }
以上代码执行后,日志输出如下:
可以看到,在开启二级缓存后,在同一个 namespace 下,查询结果确实被缓存了。