Spring AOP
Spring AOP 是一种约定编程,通过约定,将对应的方法以动态代理的方式织入约定的流程之中,在 Spring Boot 中,主要使用注解的方式配置 AOP。
Spring AOP 是一种基于方法的 AOP,只能应用在方法上。AOP 有一些基本术语如下:
- 连接点:对应被拦截的具体对象,在 Spring AOP 中指具体的方法。
- 切点:通过正则式或者规则定义连接点。
- 通知:在 Spring AOP 中根据执行顺序分为前置通知,后置通知,环绕通知,返回通知(未发生异常)和异常通知(发生异常)。
- 目标对象:被代理的对象。
- 引入:引入新的类和方法增强现有 Bean 的功能。
- 切面:定义切点、各类通知和引入的内容。
开发连接点
AOP 编程首先要确定在哪个地方需要用到 AOP,新建一个 Spring Boot 项目,定义一个 Hello 接口与一个 HelloImpl 实现类。
1
2
3
| public interface Hello {
public void hello(String s);
}
|
1
2
3
4
5
6
7
8
9
| @Component
public class HelloImpl implements Hello {
@Override
public void hello(String s) {
System.out.println("hello " + s);
}
}
|
开发切面
开发切面主要需要用的注解如下:
| 注解 |
传入参数 |
作用 |
| @Aspect |
|
定义一个切面 |
| @Pointcut |
正则式或指示器 |
定义一个切点 |
| @Before |
切点 |
定义前置通知 |
| @After |
切点 |
定义后置通知,无论是否发生异常,都会执行 |
| @AfterReturning |
切点 |
定义返回通知 |
| @AfterThrowing |
切点 |
定义异常通知 |
| @Around |
切点 |
定义环绕通知 |
| @DeclareParents |
需要增强的对象与引入增强功能的类 |
增强接口功能 |
定义一个切面 MyAspect 如下,需要将定义的切面交由 IoC 容器管理才会生效:
1
2
3
4
5
6
7
8
9
10
11
12
13
14
15
16
17
18
19
20
21
22
23
24
25
26
27
28
29
30
31
| @Aspect
@Component
public class MyAspect {
@Pointcut("execution(* top.liuzhenhui.aopdemo.HelloImpl.hello(..))")
public void pointcut(){
}
@Before("pointcut()")
public void before(){
System.out.println(">>>>>>>前置通知");
}
@After("pointcut()")
public void after(){
System.out.println(">>>>>>>后置通知");
}
@AfterReturning("pointcut()")
public void afterReturning(){
System.out.println(">>>>>>>返回通知");
}
@AfterThrowing("pointcut()")
public void afterThrowing(){
System.out.println(">>>>>>>异常通知");
}
}
|
定义完之后,可以在单元测试中测试 AOP 是否生效:
1
2
3
4
5
6
7
8
9
10
| @SpringBootTest
class AopdemoApplicationTests {
@Autowired
Hello helloImpl;
@Test
void contextLoads() {
helloImpl.hello("AOP");
}
}
|
环绕通知
刚刚定义的切面中并没有加入环绕通知,环绕通知功能十分强大,一般也不常用,它是一个能取代原有目标对象方法的通知,可以传入一个 ProceedingJoinPoint 类型的参数给它,它有一个 prodeed 方法回调原目标函数的方法。在刚刚定义的切面中加入环绕通知:
1
2
3
4
5
6
7
| @Around("pointcut()")
public void around(ProceedingJoinPoint jp) throws Throwable{
System.out.println(">>>>>>>环绕前");
jp.proceed();
System.out.println(">>>>>>>环绕后");
}
|
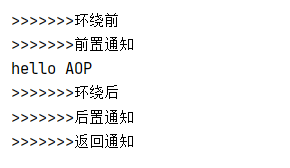
加入环绕通知后再次执行单元测试结果如下:
引入
引入能通过引入新的接口增强接口的功能,创建新的接口 Hello2 与 接口实现类 Hello2Impl 如下:
1
2
3
| public interface Hello2 {
public void hello2();
}
|
1
2
3
4
5
6
| public class Hello2Impl implements Hello2{
@Override
public void hello2() {
System.out.println(">>>>>>>>>hello2");
}
}
|
之后在定义的切面 MyAspect 中添加引入功能:
1
2
3
4
5
6
7
8
9
10
11
12
13
14
| @Aspect
@Component
public class MyAspect {
@DeclareParents(value = "top.liuzhenhui.aopdemo.HelloImpl+",
defaultImpl = Hello2Impl.class)
public Hello2 hello2;
@Pointcut("execution(* top.liuzhenhui.aopdemo.HelloImpl.hello(..))")
public void pointcut() {
}
}
|
其中, 在 @DeclareParents 注解中, value 的值是需要增强功能的目标对象,defaultImpl 的值是引入增强功能的类。
之后,在单元测试中测试引入功能:
1
2
3
4
5
6
7
8
9
10
11
12
13
14
15
16
| @SpringBootTest
class AopdemoApplicationTests {
@Autowired
Hello helloImpl;
@Test
void test2(){
Hello2 hello2 = (Hello2) helloImpl;
hello2.hello2();
}
@Test
void contextLoads() {
helloImpl.hello("AOP");
}
}
|
引入功能的原理是创建代理对象时,将增强的接口也传递进去,这样生成的代理对象就能够转换为增强的接口的类型,获得它的方法。
多个切面
Spring 支持多个切面共存,你也可以通过注解 @Order 指定它们之间的顺序即可,新建一个新的切面 MyAspect2 如下:
1
2
3
4
5
6
7
8
9
10
11
12
13
14
15
16
17
18
19
20
21
22
23
24
25
26
27
28
29
30
31
32
33
34
35
36
37
| @Aspect
@Component
@Order(1)
public class MyAspect2 {
@Pointcut("execution(* top.liuzhenhui.aopdemo.HelloImpl.hello(..))")
public void pointcut() {
}
@Around("pointcut()")
public void around(ProceedingJoinPoint jp) throws Throwable {
System.out.println("MyAspect2>>>>>>>环绕前");
jp.proceed();
System.out.println("MyAspect2>>>>>>>环绕后");
}
@Before("pointcut()")
public void before() {
System.out.println("MyAspect2>>>>>>>前置通知");
}
@After("pointcut()")
public void after() {
System.out.println("MyAspect2>>>>>>>后置通知");
}
@AfterReturning("pointcut()")
public void afterReturning() {
System.out.println("MyAspect2>>>>>>>返回通知");
}
@AfterThrowing("pointcut()")
public void afterThrowing() {
System.out.println("MyAspect2>>>>>>>异常通知");
}
}
|
修改 MyAspect 如下:
1
2
3
4
5
6
7
8
9
10
11
12
13
14
15
16
17
18
19
20
21
22
23
24
25
26
27
28
29
30
31
32
33
34
35
36
37
38
39
40
41
42
| @Aspect
@Component
@Order(2)
public class MyAspect {
@DeclareParents(value = "top.liuzhenhui.aopdemo.HelloImpl",
defaultImpl = Hello2Impl.class)
public Hello2 hello2;
@Pointcut("execution(* top.liuzhenhui.aopdemo.HelloImpl.hello(..))")
public void pointcut() {
}
@Around("pointcut()")
public void around(ProceedingJoinPoint jp) throws Throwable {
System.out.println("MyAspect1>>>>>>>环绕前");
jp.proceed();
System.out.println("MyAspect1>>>>>>>环绕后");
}
@Before("pointcut()")
public void before() {
System.out.println("MyAspect1>>>>>>>前置通知");
}
@After("pointcut()")
public void after() {
System.out.println("MyAspect1>>>>>>>后置通知");
}
@AfterReturning("pointcut()")
public void afterReturning() {
System.out.println("MyAspect1>>>>>>>返回通知");
}
@AfterThrowing("pointcut()")
public void afterThrowing() {
System.out.println("MyAspect1>>>>>>>异常通知");
}
}
|
通过单元测试查看多个切面的执行结果如下:
1
2
3
4
5
6
7
8
9
10
11
| MyAspect2>>>>>>>环绕前
MyAspect2>>>>>>>前置通知
MyAspect1>>>>>>>环绕前
MyAspect1>>>>>>>前置通知
hello AOP
MyAspect1>>>>>>>环绕后
MyAspect1>>>>>>>后置通知
MyAspect1>>>>>>>返回通知
MyAspect2>>>>>>>环绕后
MyAspect2>>>>>>>后置通知
MyAspect2>>>>>>>返回通知
|
通过执行结果可以看出,多个切面之间的执行是责任链模型的顺序来执行的。
获取方法参数
想要在通知中获取方法参数,如果是环绕通知,它的 ProceedingJoinPoint 类型的参数的 getArgs 方法就可以获得参数。
如果是非环绕通知,可以通过一个 JoinPoint 类型的参数的 getArgs 方法获得参数。
在前置通知与环绕通知中测试获取参数,修改 MyAspect 中的两个方法如下:
1
2
3
4
5
6
7
8
9
10
11
12
13
14
| @Around("pointcut()")
public void around(ProceedingJoinPoint jp) throws Throwable {
System.out.println("MyAspect1>>>>>>>环绕前");
jp.proceed();
System.out.println(Arrays.toString(jp.getArgs()));
System.out.println("MyAspect1>>>>>>>环绕后");
}
@Before("pointcut()")
public void before(JoinPoint jp) {
System.out.println(Arrays.toString(jp.getArgs()));
System.out.println("MyAspect1>>>>>>>前置通知");
}
|
然后在单元测试中测试获取参数的结果即可。